前言
在现在开发的过程中应该大多数朋友都有遇到过切换数据源的需求。比如现在常用的数据库读写分离,或者就是有两个数据库的情况,这些都需要用到切换数据源。
手动切换数据源 使用Spring的AbstractRoutingDataSource类来进行拓展多数据源。
该类就相当于一个dataSource的路由,用于根据key值来进行切换对应的dataSource。
下面简单来看下AbstractRoutingDataSource类的几段关键源码:
1
2
3
4
5
6
7
8
9
10
11
12
13
14
15
16
17
18
19
20
21
22
23
24
25
26
27
28
29
30
31
32
33
34
35
36
37
38
39
@Override public Connection getConnection () throws SQLException {return determineTargetDataSource().getConnection();@Override public Connection getConnection (String username, String password) throws SQLException {return determineTargetDataSource().getConnection(username, password);protected DataSource determineTargetDataSource () {this .resolvedDataSources, "DataSource router not initialized" );Object lookupKey = determineCurrentLookupKey();DataSource dataSource = this .resolvedDataSources.get(lookupKey);if (dataSource == null && (this .lenientFallback || lookupKey == null )) {this .resolvedDefaultDataSource;if (dataSource == null ) {throw new IllegalStateException ("Cannot determine target DataSource for lookup key [" + lookupKey + "]" );return dataSource;protected abstract Object determineCurrentLookupKey () ;
可以看到其中获取链接的方法getConnection()调用的determineTargetDataSource则是关键方法。该方法用于返回我们使用的数据源。
其中呢又是determineCurrentLookupKey()方法来返回当前数据源的key值。resolvedDataSources这个map中找到对应的value(该value就是数据源)。
resolvedDataSources这个map则是在:
1
2
3
4
5
6
7
8
9
10
11
12
13
14
15
@Override public void afterPropertiesSet () {if (this .targetDataSources == null ) {throw new IllegalArgumentException ("Property 'targetDataSources' is required" );this .resolvedDataSources = new HashMap <Object, DataSource>(this .targetDataSources.size());for (Map.Entry<Object, Object> entry : this .targetDataSources.entrySet()) {Object lookupKey = resolveSpecifiedLookupKey(entry.getKey());DataSource dataSource = resolveSpecifiedDataSource(entry.getValue());this .resolvedDataSources.put(lookupKey, dataSource);if (this .defaultTargetDataSource != null ) {this .resolvedDefaultDataSource = resolveSpecifiedDataSource(this .defaultTargetDataSource);
这个方法通过targetDataSources这个map来进行赋值的。targetDataSources则是我们在配置文件中进行赋值的,下面会讲到。
再来看看determineCurrentLookupKey()方法,从protected来修饰就可以看出是需要我们来进行重写的。
DynamicDataSource 和 DataSourceHolder 于是我新增了DynamicDataSource类,代码如下:
1
2
3
4
5
6
7
8
9
10
11
12
13
14
15
16
17
package com.crossoverJie.util;import org.springframework.jdbc.datasource.lookup.AbstractRoutingDataSource;public class DynamicDataSource extends AbstractRoutingDataSource {@Override protected Object determineCurrentLookupKey () {return DataSourceHolder.getDataSources();
代码很简单,继承了AbstractRoutingDataSource类并重写了其中的determineCurrentLookupKey()方法。
这里直接用DataSourceHolder返回了一个数据源。
DataSourceHolder代码如下:
1
2
3
4
5
6
7
8
9
10
11
12
13
14
15
16
17
18
19
20
package com.crossoverJie.util;public class DataSourceHolder {private static final ThreadLocal<String> dataSources = new ThreadLocal <String>();public static void setDataSources (String dataSource) {public static String getDataSources () {return dataSources.get();
这里我使用了ThreadLocal来保存了数据源,关于ThreadLocal的知识点可以查看以下这篇文章:解密ThreadLocal
之后在Spring的配置文件中配置我们的数据源,就是上文讲到的为targetDataSources赋值:
1 2 3 4 5 6 7 8 9 10 11 12 13 14 15 16 17 18 19 20 21 22 23 24 25 26 27 28 29 30 31 32 33 34 35 36 37 38 39 40 41 42 43 44 45 46 47 48 49 50 51 52 53 54 55 56 57 58 59 60 61 62 63 64 65 66 <bean id ="ssm1DataSource" class ="com.alibaba.druid.pool.DruidDataSource" init-method ="init" destroy-method ="close" > <property name ="driverClassName" value ="${jdbc.driverClass}" /> <property name ="url" value ="${jdbc.url}" /> <property name ="username" value ="${jdbc.user}" /> <property name ="password" value ="${jdbc.password}" /> <property name ="initialSize" value ="3" /> <property name ="minIdle" value ="3" /> <property name ="maxActive" value ="20" /> <property name ="maxWait" value ="60000" /> <property name ="timeBetweenEvictionRunsMillis" value ="60000" /> <property name ="minEvictableIdleTimeMillis" value ="300000" /> <property name ="validationQuery" value ="SELECT 'x'" /> <property name ="testWhileIdle" value ="true" /> <property name ="testOnBorrow" value ="false" /> <property name ="testOnReturn" value ="false" /> <property name ="poolPreparedStatements" value ="true" /> <property name ="maxPoolPreparedStatementPerConnectionSize" value ="20" /> <property name ="filters" value ="stat" /> </bean > <bean id ="ssm2DataSource" class ="com.alibaba.druid.pool.DruidDataSource" init-method ="init" destroy-method ="close" > <property name ="driverClassName" value ="${jdbc.driverClass}" /> <property name ="url" value ="${jdbc.url2}" /> <property name ="username" value ="${jdbc.user2}" /> <property name ="password" value ="${jdbc.password2}" /> <property name ="initialSize" value ="3" /> <property name ="minIdle" value ="3" /> <property name ="maxActive" value ="20" /> <property name ="maxWait" value ="60000" /> <property name ="timeBetweenEvictionRunsMillis" value ="60000" /> <property name ="minEvictableIdleTimeMillis" value ="300000" /> <property name ="validationQuery" value ="SELECT 'x'" /> <property name ="testWhileIdle" value ="true" /> <property name ="testOnBorrow" value ="false" /> <property name ="testOnReturn" value ="false" /> <property name ="poolPreparedStatements" value ="true" /> <property name ="maxPoolPreparedStatementPerConnectionSize" value ="20" /> <property name ="filters" value ="stat" /> </bean > <bean id ="dataSource" class ="com.crossoverJie.util.DynamicDataSource" > <property name ="targetDataSources" > <map key-type ="java.lang.String" > <entry key ="ssm1DataSource" value-ref ="ssm1DataSource" /> <entry key ="ssm2DataSource" value-ref ="ssm2DataSource" /> </map > </property > <property name ="defaultTargetDataSource" ref ="ssm1DataSource" /> </bean >
这里分别配置了两个数据源:ssm1DataSource和ssm2DataSource。Spring的依赖注入方式将两个数据源设置进targetDataSources。
接下来的用法相比大家也应该猜到了。
就是在每次调用数据库之前我们都要先通过DataSourceHolder来设置当前的数据源。看下demo:
1
2
3
4
5
6
@Test public void selectByPrimaryKey () throws Exception {Datasource datasource = dataSourceService.selectByPrimaryKey(7 );
详见我的单测。
使用起来也是非常简单。但是不知道大家注意到没有,这样的做法槽点很多:
每次使用需要手动切换,总有一些人会忘记写(比如我)。
如果是后期需求变了,查询其他的表了还得一个个改回来。
那有没有什么方法可以自动的帮我们切换呢?
肯定是有的,大家应该也想得到。就是利用Spring的AOP了。
自动切换数据源 首先要定义好我们的切面类DataSourceExchange:
1
2
3
4
5
6
7
8
9
10
11
12
13
14
15
16
17
18
19
20
21
22
23
24
25
26
27
28
29
30
31
32
33
34
35
36
37
38
39
40
41
42
package com.crossoverJie.util;import org.aspectj.lang.JoinPoint;public class DataSourceExchange {public void before (JoinPoint point) {String whichDataSource = aClass.getName().substring(25 , aClass.getName().lastIndexOf("." ));if ("ssmone" .equals(whichDataSource)) {else {public void after () {null );
逻辑也比较简单,就是在执行数据库操作之前做一个切面。
通过JoinPoint对象获取目标对象。
在目标对象中获取包名来区分不同的数据源。
根据不同数据源来进行赋值。
执行完毕之后将数据源清空。
关于一些JoinPoint的API:
1
2
3
4
5
6
7
8
9
10
11
12
13
14
package org.aspectj.lang;import org.aspectj.lang.reflect.SourceLocation;public interface JoinPoint {toString () ; toShortString () ; toLongString () ; getThis () ; getTarget () ; getSignature () ; getSourceLocation () ;getKind () ; getStaticPart () ;
为了通过包名来区分不同数据源,我将目录结构稍微调整了下:
将两个不同的数据源的实现类放到不同的包中,这样今后如果还需要新增其他数据源也可以灵活的切换。
看下Spring的配置:
1 2 3 4 5 6 7 8 9 10 11 12 13 14 15 16 17 18 19 20 21 <bean id ="dataSourceExchange" class ="com.crossoverJie.util.DataSourceExchange" /> <aop:config proxy-target-class ="false" > <aop:pointcut id ="controllerMethodPointcut" expression =" execution(* com.crossoverJie.service.*.select*(..))" /><aop:pointcut id ="selectMethodPointcut" expression =" execution(* com.crossoverJie.dao..*Mapper.select*(..))" /><aop:advisor advice-ref ="methodCacheInterceptor" pointcut-ref ="controllerMethodPointcut" /> <aop:aspect ref ="dataSourceExchange" > <aop:pointcut id ="dataSourcePointcut" expression ="execution(* com.crossoverJie.service.*.*(..))" /> <aop:before pointcut-ref ="dataSourcePointcut" method ="before" /> <aop:after pointcut-ref ="dataSourcePointcut" method ="after" /> </aop:aspect > </aop:config >
这是在我们上一篇整合redis缓存 的基础上进行修改的。
实际使用:
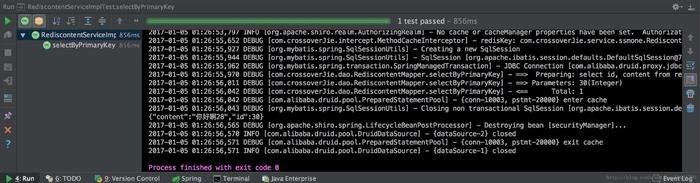
1
2
3
4
5
@Test public void selectByPrimaryKey () throws Exception {Rediscontent rediscontent = rediscontentService.selectByPrimaryKey(30 );
这样看起来就和使用一个数据源这样简单,再也不用关心切换的问题了。
总结 不过按照这样的写法是无法做到在一个事务里控制两个数据源的。这个我还在学习中,有相关经验的大牛不妨指点一下。
项目地址:https://github.com/crossoverJie/SSM.git
个人博客地址:http://crossoverjie.top 。
GitHub地址:https://github.com/crossoverJie 。