since 3.5.15 the async MV reload on FE restart makes this a serious regression: during image load onReload() sets active = false first and restores it asynchronously, leaving a minutes-long window in which MVs are transiently inactive. MVActiveChecker picks them up and runs ALTER MATERIALIZED VIEW xxx ACTIVE, and the activation path calls refreshMaterializedView(…, force=true, …) — so every FE leader restart triggers a FORCE full refresh of all async MVs.
一开始是因为在 X 上刷到 Bun 官方博客一篇《Rewriting Bun in Rust》,作者是 Jarred Sumner。看完挺震撼的——1 个工程师,用 CC(Claude Code)+ Claude Fable 5(重写那会儿还是预发布,现在订阅用户已经能正常用了),11 天把整个 Bun 从 Zig 重写成 Rust,落地 diff +100 万行,6,778 个 commit。
监工 11 天:原文——「most of those 11 days, I monitored workflows, manually reading the outputs to check for issues and bugs, and prompting Claude to edit the loop to fix things」。也就是人工读输出、发现问题、改 workflow 的 prompt 让 Claude 自己修。
]]><h1 id="背景"><a href="#背景" class="headerlink" title="背景"></a>背景</h1><p>最近将终端从 Warp 切换到了 cmux,用了一段时间后,现在已经基本上满足我的所有需求,所以才有这篇安利的文章。</p>
<p>开始之前先回顾下自己的终端使用历史。刚开始工作那时候使用的是 Windows,用得最多的终端就是 xshell,后面切换到 macOS 之后自然就切换到了 mac 上用的最多的 iTerm2。</p>I Built an AI-Powered StarRocks Upgrade Risk Scanner — And It Caught a Real Riskhttp://crossoverjie.top/2026/06/14/starrocks/StarRocks-upgrade-skill-principle-en/2026-06-14T17:00:00.000Z2026-07-30T08:43:22.978ZBackground
I’ve been working on a cross-version upgrade of StarRocks (3.3 → 3.5) and hit quite a few pitfalls along the way. I previously wrote a post on StarRocks Upgrade Considerations documenting the manual upgrade process, but that was only for minor version upgrades (3.3.3 → 3.3.9).
Cross-major-version upgrades are an entirely different beast — between 3.3 and 3.5 there are 6000+ commits, hiding all kinds of incompatible changes: default config values changed, session variables modified, protocol fields removed… Manually reviewing each one is simply not feasible. Missing a single critical change could lead to a production incident.
So I thought: can AI help me do this job? After some iteration, I hand-crafted a StarRocks upgrade risk scanner using Claude Code (starrocks-upgrade skill). This article discusses its design principles.
Before upgrading now, I run the Skill first. It prompts you to input cluster information for downstream analysis:
After collecting that, it gathers commit diffs between the two versions, analyzes them, and generates an upgrade report highlighting potential risks, like this one:
We actually encountered this exact issue after the upgrade — having the report in advance made resolving it much easier.
Problem Domain: Why Upgrades Are So Hard
Let’s first clarify the core problem. The difficulty of cross-version StarRocks upgrades isn’t the “upgrade operation” itself — it’s not knowing what will happen before upgrading.
Incompatible Changes Are Hard to Spot
Default config value changes, session variable modifications, BE config tweaks between versions are often buried in thousands of commits. The traditional approach is to manually read Release Notes, but many behavioral changes aren’t documented in RNs at all.
Impact Scope Is Hard to Assess
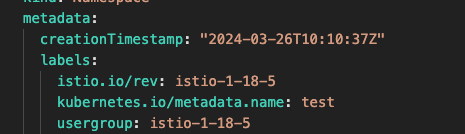
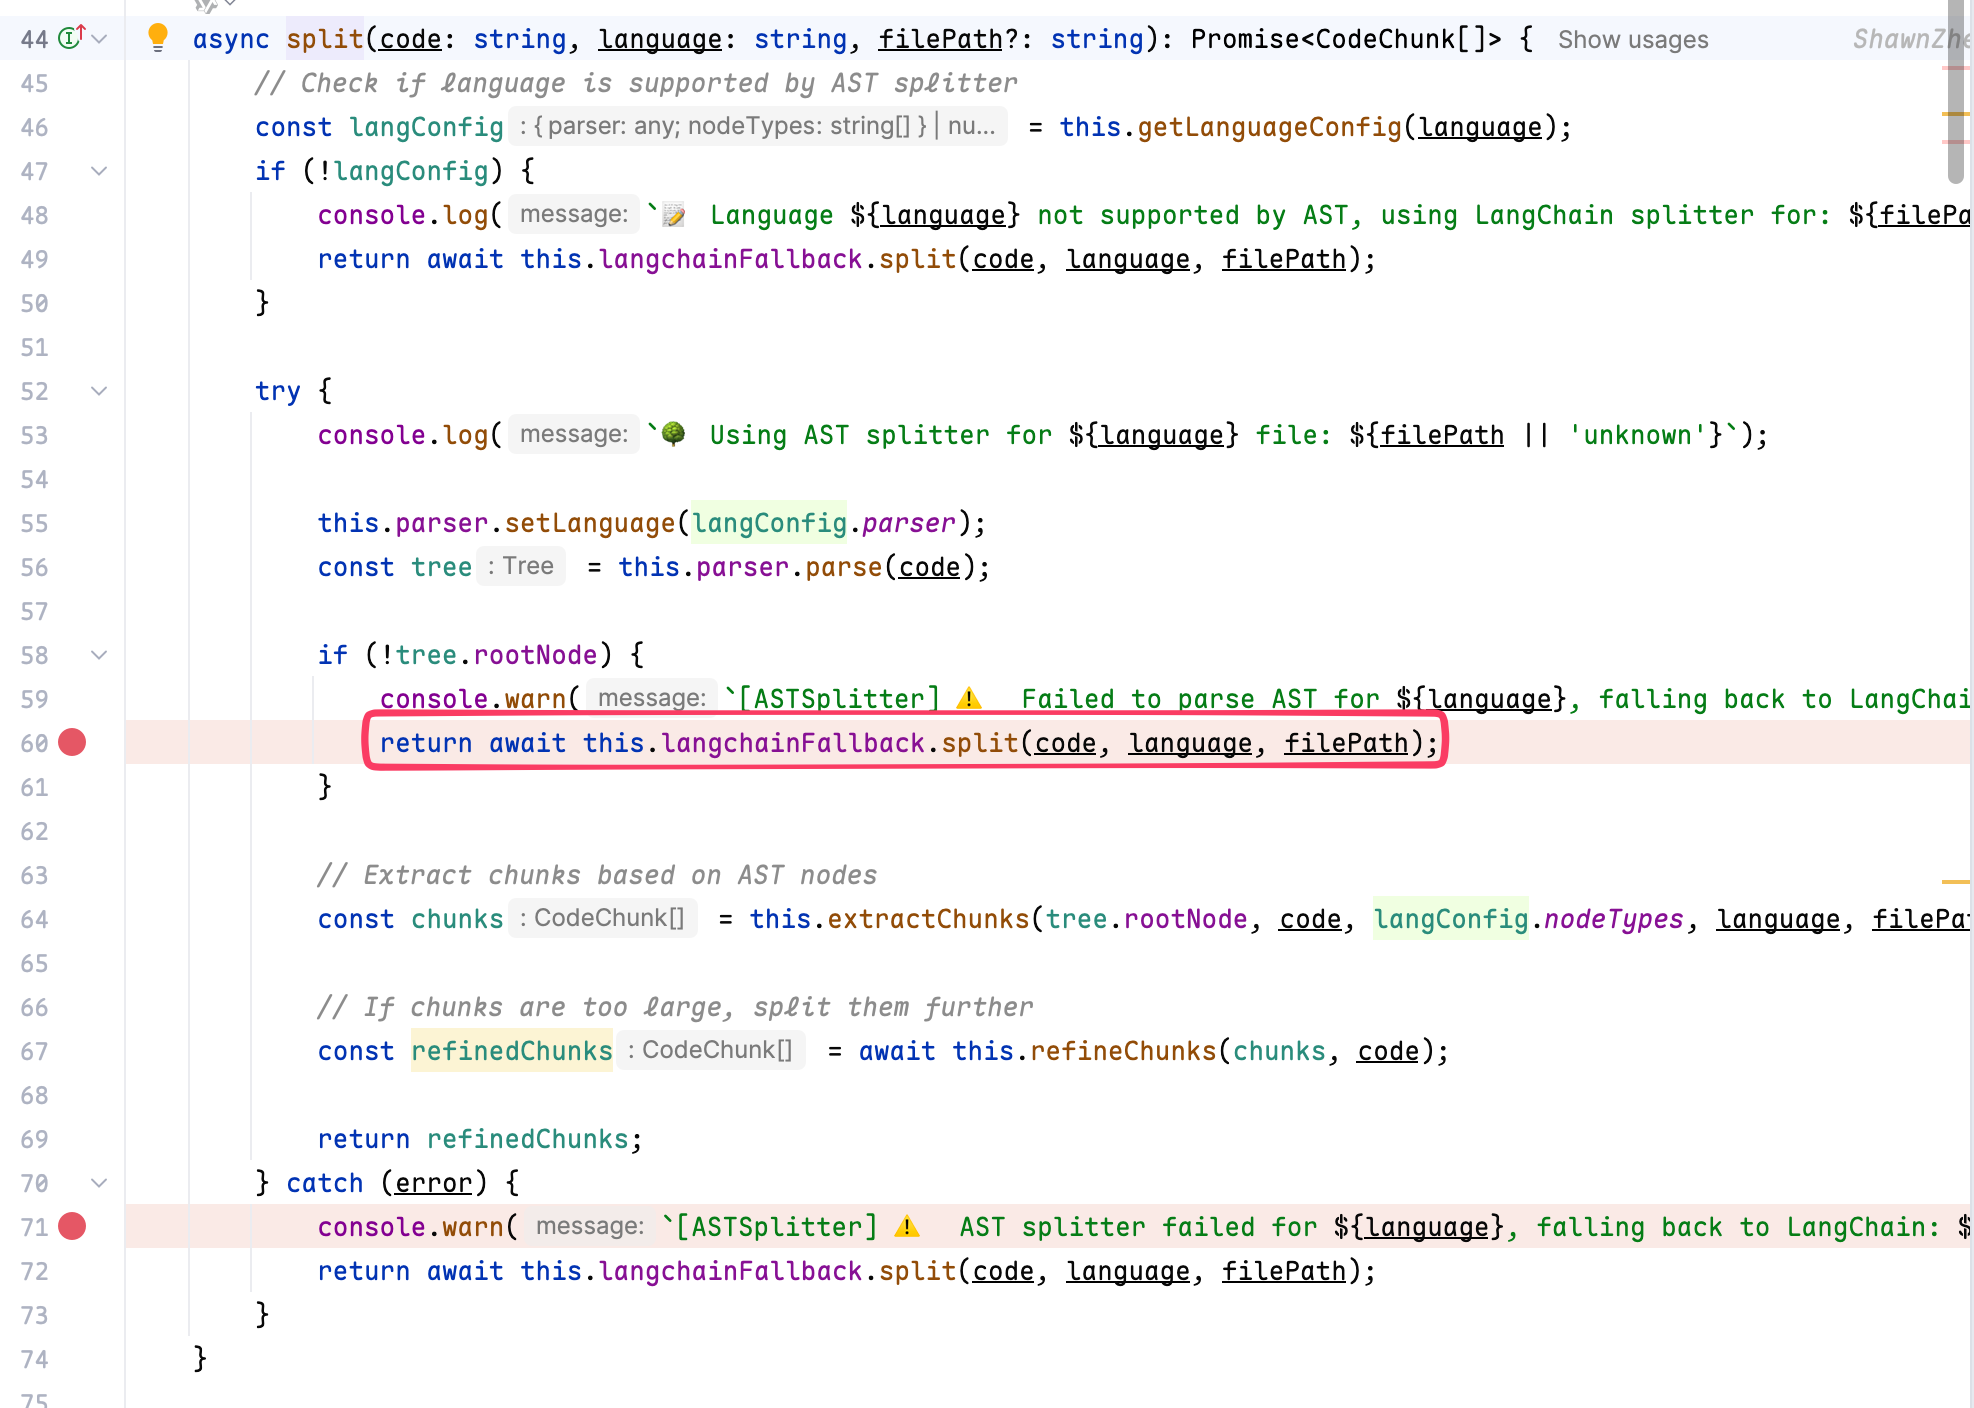
A single config default change can have cascading effects through indirect call chains. For example, transform_type_prefer_string_for_varchar changing from false to true looks like just a default value tweak, but it indirectly causes materialized view invalidation through MV re-activation. This kind of indirect impact chain is virtually impossible to catch by eye.
Cluster-Specific Risks Can’t Be Quantified
Different clusters have different configurations (fe.conf/be.conf), deployment methods (K8s/VM), and scales (MV count, table count). Generic upgrade advice can’t cover risks specific to your cluster. The same default value change poses very different risks: if you’ve already overridden it in your conf, the risk is low; but if you happen to use the old default, the upgrade changes behavior directly.
Shortcomings of Existing Approaches
Approach
Shortcoming
Manually reading Release Notes
Incomplete — many behavioral changes aren’t recorded in RNs
git log --oneline A..B
Only shows commit list, can’t judge compatibility risk
CI/CD automated tests
Only verifies functional correctness, can’t catch config conflicts or operational impacts
Reading PRs one by one
Analysis is one-sided — looking at PR diffs alone can’t reveal call chains and upstream/downstream impacts
The PR-by-PR analysis is especially treacherous. A PR diff only shows the changed code snippet — you can’t see the class context or upstream/downstream call relationships. For the transform_type_prefer_string_for_varchar example, the PR diff merely modifies a default value in Config.java, but you can’t see that AnalyzerUtils.transformTableColumnType() reads this config, MaterializedViewAnalyzer calls it, and AlterJobMgr.reActivateMV() indirectly triggers MV re-parsing. This complete indirect impact chain is absolutely invisible from a PR diff alone.
Core Design Choice: Full Source Code Scanning
Based on the analysis above, the tool makes a fundamental design choice: it must run in the StarRocks source code root directory, rather than reading GitHub diffs PR by PR.
The reason is straightforward:
Capability
PR-by-PR Analysis
Full Source Scanning
Identifying removed config items
No (deleted lines don’t appear in PR diffs)
Yes — parses Config.java from both versions and compares field sets
Tracing indirect call chains
No — lacks source context
Yes — recursive grep in the source tree
Cluster config conflict detection
No — can’t read user conf files
Yes — parses cluster-profile.yaml and cross-references with Scanner results
Identifying “default changed but user hasn’t overridden”
No
Yes — compares conf values against old/new defaults
In short: no source context, no deep analysis.
Design Philosophy: Prefer False Positives Over False Negatives
The tool’s core design philosophy is prefer false positives over false negatives.
The reason is simple: the cost of upgrade risks is asymmetric. Missing an incompatible change could cause a production incident, while a false positive only adds manual verification work. So the tool employs a multi-layered scanning strategy: 11 specialized Scanners covering known risk patterns + per-commit Tier classification to ensure nothing is missed.
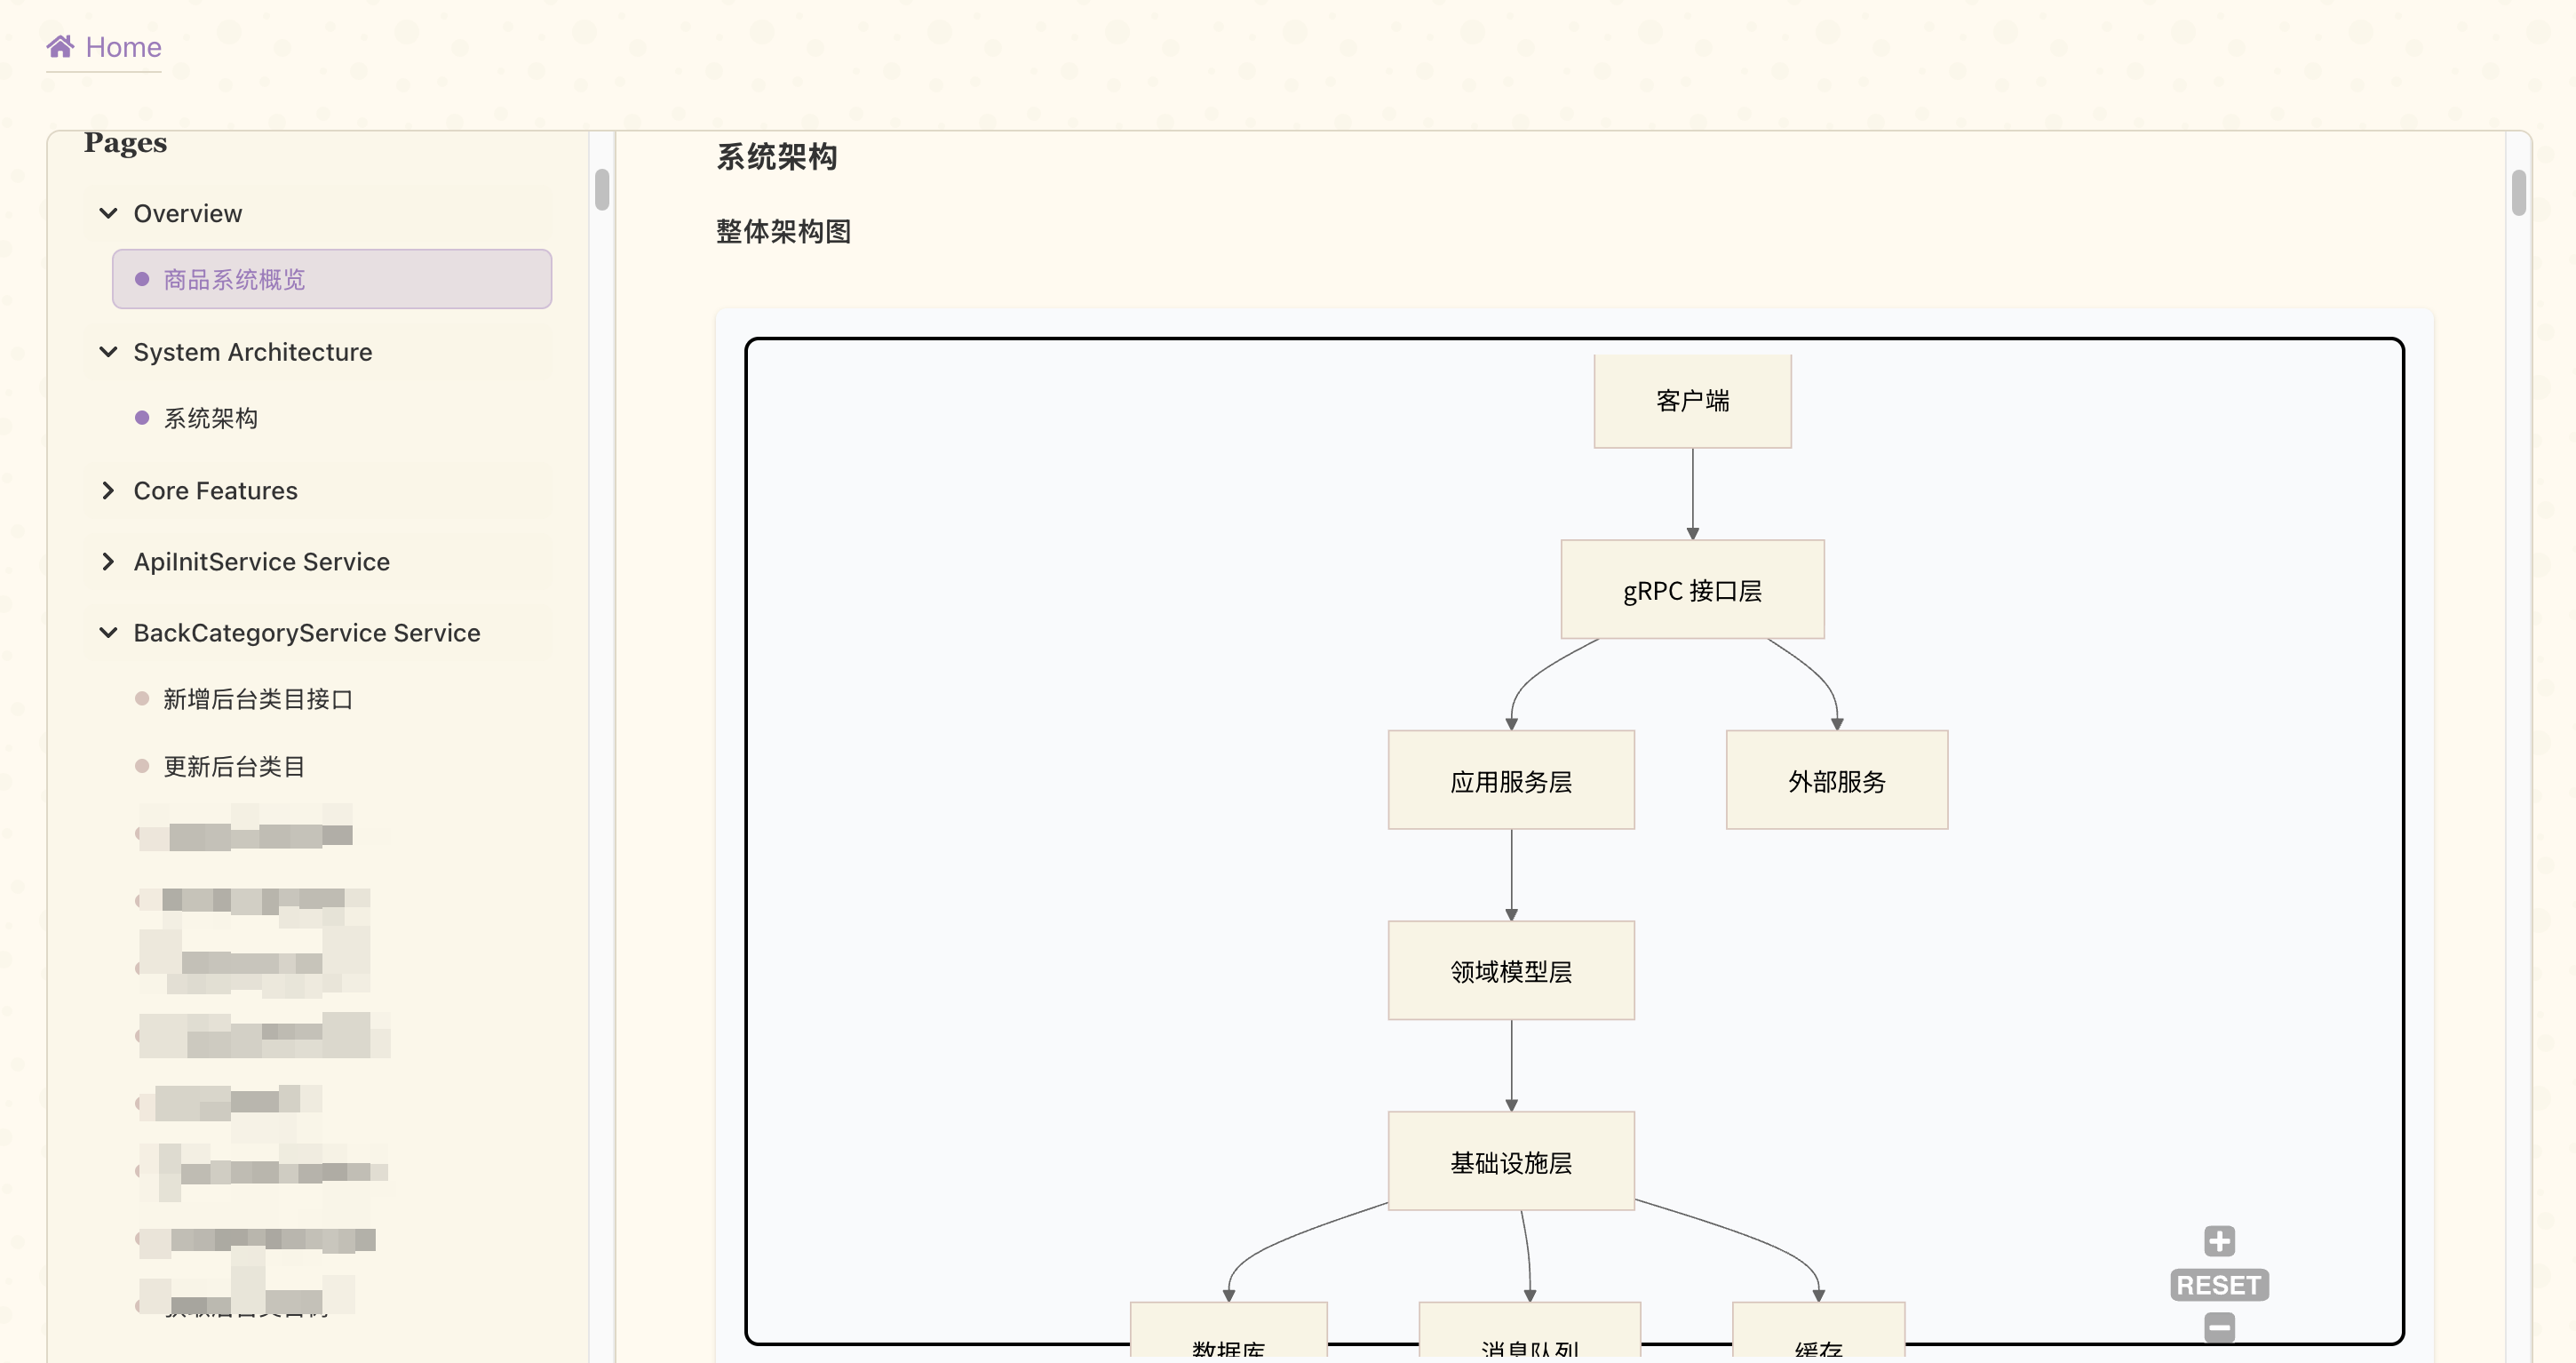
Overall Architecture
The tool’s workflow is divided into four phases. Here’s the big picture:
Phase 1: Data Collection
This is the foundation of the entire tool, implemented by starrocks_upgrade.py. It does quite a lot:
Git Commit Diff Collection
It uses git log branchA..branchB to get commits unique to the target branch, then classifies each commit. There’s a key optimization here — using custom delimiters (SOH/STX) to fetch all commit details in a single git log call, avoiding N+1 queries.
Commit Tier Classification
Not every commit needs deep analysis. The tool classifies commits into four tiers:
Tier
Match Criteria
Handling
SKIP
test/docs/build directories; commit prefix is build/chore/ci/style
Count only
HIGH
Core paths: FE optimizer/executor/SQL parsing, BE runtime/storage, Protocol/IDL
Save full diff + deep analysis
MEDIUM
Business paths: connectors/auth/permissions; feat/fix type source changes
Save full diff + analysis
LOW
All other changes
Save metadata only
This way, HIGH/MEDIUM commits get deep analysis, while LOW/SKIP commits don’t waste resources.
11 Specialized Scanners
This is the most critical part of the tool, covering 11 dimensions of upgrade risk:
FE side:
Config Scanner — scans @ConfField config changes in Config.java
Session Variable Scanner — scans @VarAttr variable changes in SessionVariable.java
System Variable Scanner — scans GlobalVariable.java
This deserves a closer look, since Config.java parsing is the most complex part of the tool.
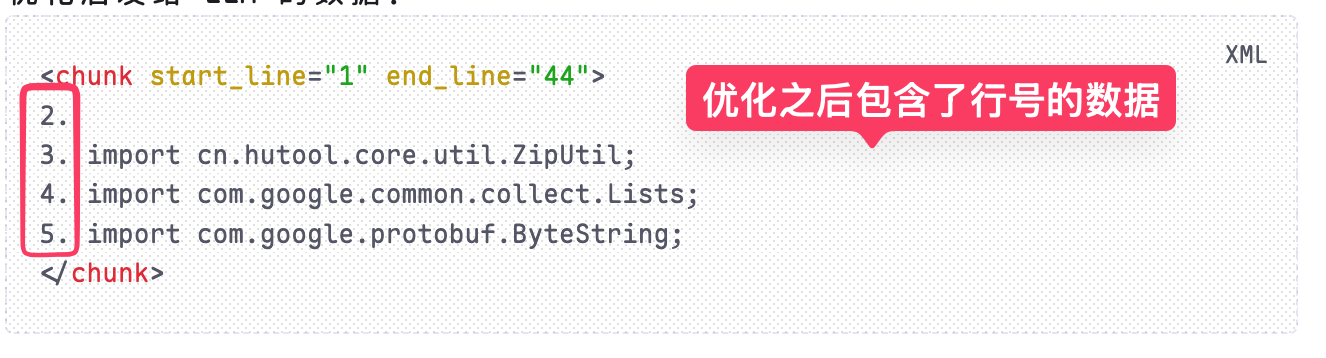
Java annotations can span multiple lines:
1 2 3
@ConfField(mutable = true, comment = "Whether to prefer string type " + "for fixed length varchar column in materialized view creation/ctas") publicstaticbooleantransform_type_prefer_string_for_varchar=true;
So the parser uses a line-by-line state machine approach:
The state machine tracks ( and ) pairing, concatenates multi-line annotations, then parses the mutable and comment attributes. Compared to simple regex matching, this approach correctly handles various edge cases.
BE Config Parsing
The BE side uses C++ macro definitions for configuration, requiring a completely different parsing approach:
The regex CONF_(m?\w+)\((\w+),\s*"([^"]*)"\) extracts everything in one pass. Note that the m prefix indicates mutable — runtime-modifiable.
Cluster Config Conflict Detection
This is the feature I find most useful. The risk of the same default value change varies dramatically across scenarios:
Scenario
Example
Risk
Config removed + you have it in conf
mysql_service_nio_enabled deleted, you have = true in conf
HIGH — startup error
Default changed + you use old default
enable_load_volume_from_conf true→false, you have = true in conf
MEDIUM — your override takes effect, but decide whether to follow
Default changed + you have custom value
You set = custom_value in conf
LOW — your override takes priority
Default changed + you haven’t overridden
mysql_server_version 5.1.0→8.0.33, not in your conf
HIGH — new default takes effect automatically
This precise distinction is far more useful than vaguely saying “some config default changed.”
Deployment-Aware
The tool also generates deployment-specific risk alerts based on the cluster’s deployment method:
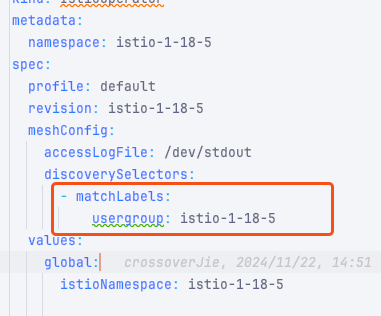
For example, in a K8s environment, FE Pod restarts trigger MV re-activation. If there are MV-related code changes, this could cause schema incompatibilities. In VM environments, the focus is more on upgrade order (BE first, then FE).
Phase 2: Commit Diff Analysis
Phase 1 saved the full diffs of HIGH/MEDIUM commits. Phase 2 is executed by AI Agents, using parallel subagents for deep compatibility analysis of commits.
Since cross-version diffs typically have a large number of commits (1361 HIGH tier commits for 3.3→3.5), sequential analysis is impractical. So commits are grouped by module, with 5-8 commits per group assigned to a parallel subagent:
All CRITICAL/HIGH level findings from Phase 2’s output + Phase 1’s Scanner results require further deep analysis. Each (or each batch of related) findings is assigned a parallel subagent that traces call chains via grep in the source tree.
This is one of the tool’s most distinctive designs — system lifecycle entry-point tracing. A config change may not be directly referenced by lifecycle code, but reaches it through an indirect call chain:
1 2 3 4
transform_type_prefer_string_for_varchar(Config) └─ AnalyzerUtils.transformTableColumnType()(direct caller) └─ MaterializedViewAnalyzer(indirect caller) └─ AlterJobMgr.reActivateMV()(system lifecycle entry: triggered on FE restart)
Without tracing this indirect path, you’d miss the critical risk of “MV re-activation failure after FE restart.”
Phase 4: Report Synthesis
All analysis results from Phases 1-3 are synthesized into a structured upgrade report.
The report’s core design principles:
INCOMPATIBLE CHANGES at the top: The most critical information comes first, sorted by CRITICAL > HIGH
Error scenarios categorized by trigger timing: After FE restart / After CN restart / Daily queries / During upgrade
Cluster-specific conflict detection: Only conflicts relevant to the user’s cluster configuration are shown
Actionable Upgrade Checklist: Every step is concrete and executable
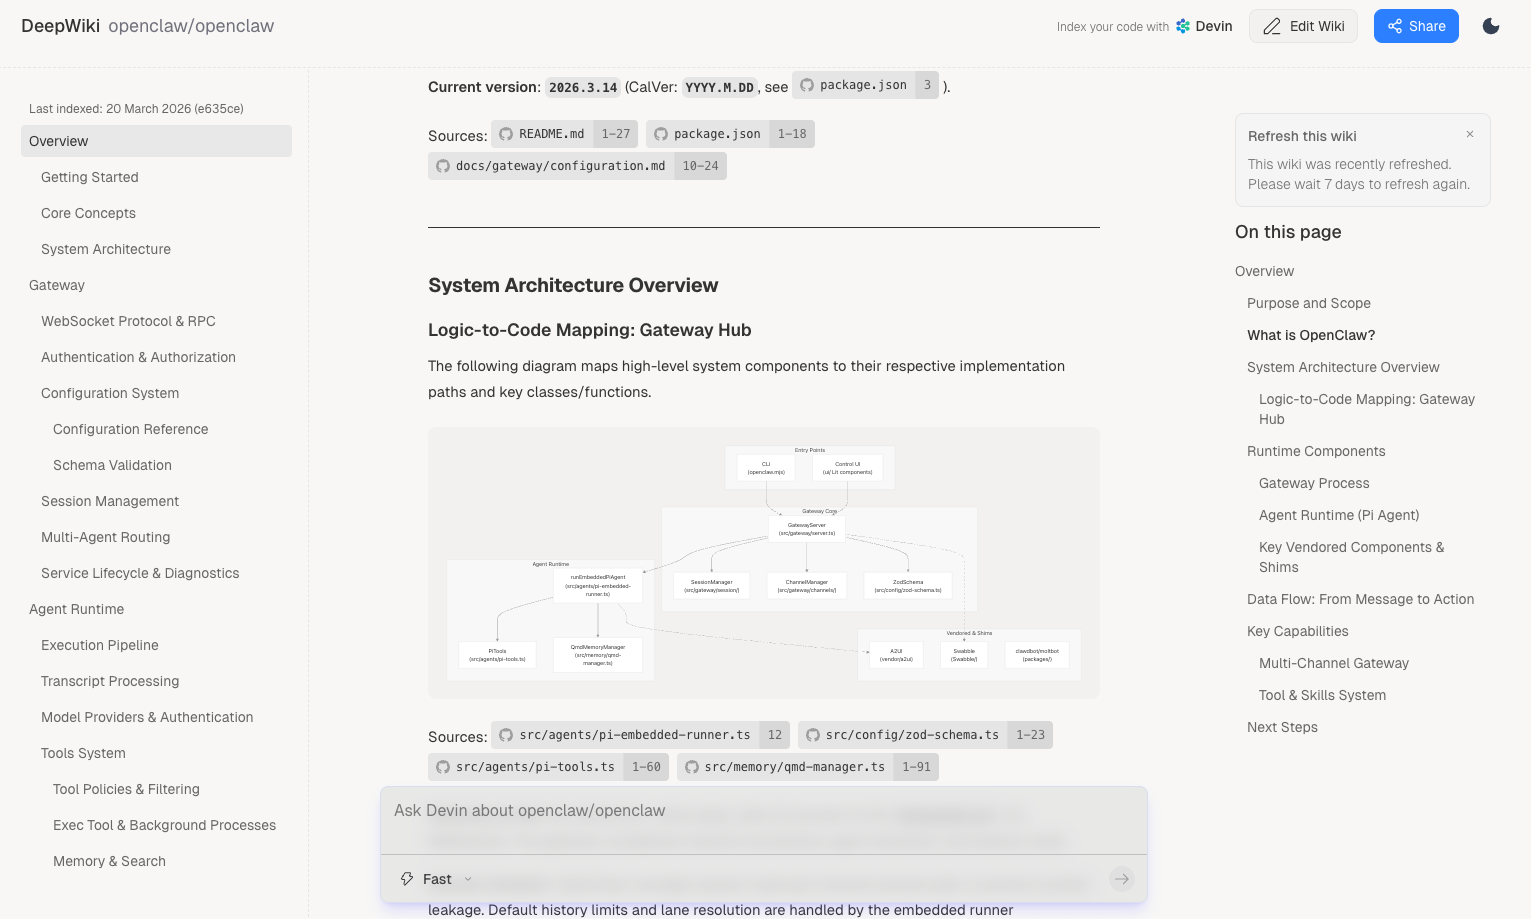
Full Data Flow Diagram
Looking at Phase 1’s data flow as a whole makes it clearer:
Unified Impact Model
All Scanner findings use a unified four-dimensional impact model:
Every finding includes a four-dimensional assessment, making it easy to filter and aggregate by dimension.
Summary
The design philosophy of this tool can be distilled into these key points:
Source code is truth: All analysis is built on the complete source tree, not on PR diff snippets returned by GitHub API. No source context, no deep analysis.
Layered processing: Not every commit deserves deep analysis. The tier classification strategy ensures critical commits get deep analysis while low-risk commits don’t waste resources.
Specialized Scanners + AI Agent combination: Python scripts handle deterministic data collection and pattern matching (11 Scanners), while AI Agents handle uncertain deep analysis (call chain tracing, impact assessment). Each plays to its strengths.
Cluster-specific: Instead of generic advice, it cross-references the user’s actual fe.conf/be.conf to precisely identify cluster-specific risks.
Prefer false positives over false negatives: The cost of upgrade risks is asymmetric — the cost of a missed finding far outweighs a false alarm.
There are also limitations: Protocol/Parser Scanner precision is limited, indirect call chain tracing depends on AI Agent capability, runtime behavioral changes can’t be detected, and large repo performance is an issue (6000+ commits take 30+ minutes). These are areas for future improvement.
If you also maintain StarRocks clusters and frequently need cross-version upgrades, give this tool a try. At least in my case, it helped me discover several incompatible changes that weren’t mentioned in the Release Notes.
For large-scale projects like this, complex contextual analysis is exactly where LLMs excel — making them perfectly suited for this kind of previously manual labor-intensive work.
]]><h1 id="Background"><a href="#Background" class="headerlink" title="Background"></a>Background</h1><p>I’ve been working on a cross-version upgrade of StarRocks (3.3 → 3.5) and hit quite a few pitfalls along the way. I previously wrote a post on <a href="https://crossoverjie.top/2025/03/14/starrocks/StarRocks-upgrade/">StarRocks Upgrade Considerations</a> documenting the manual upgrade process, but that was only for minor version upgrades (3.3.3 → 3.3.9).</p>
<p>Cross-major-version upgrades are an entirely different beast — between 3.3 and 3.5 there are 6000+ commits, hiding all kinds of incompatible changes: default config values changed, session variables modified, protocol fields removed… Manually reviewing each one is simply not feasible. Missing a single critical change could lead to a production incident.</p>
<p>So I thought: can AI help me do this job? After some iteration, I hand-crafted a StarRocks upgrade risk scanner using Claude Code (<a href="https://github.com/crossoverJie/skills/blob/main/skills/starrocks-upgrade/SKILL.md">starrocks-upgrade skill</a>). This article discusses its design principles.</p>
<p>Before upgrading now, I run the Skill first. It prompts you to input cluster information for downstream analysis:<br><img src="https://cdn.jsdelivr.net/gh/crossoverJie/images@main/images/images202606181026011.png"></p>
<p>After collecting that, it gathers commit diffs between the two versions, analyzes them, and generates an upgrade report highlighting potential risks, like this one:<br><img src="https://cdn.jsdelivr.net/gh/crossoverJie/images@main/images/images202606181113157.png"></p>
<p>We actually encountered this exact issue after the upgrade — having the report in advance made resolving it much easier.</p>我做了一个 AI 版的 StarRocks 升级风险扫描工具,直接帮我定位到一个风险http://crossoverjie.top/2026/06/14/starrocks/StarRocks-upgrade-skill-principle/2026-06-14T17:00:00.000Z2026-07-30T08:43:22.979Z背景
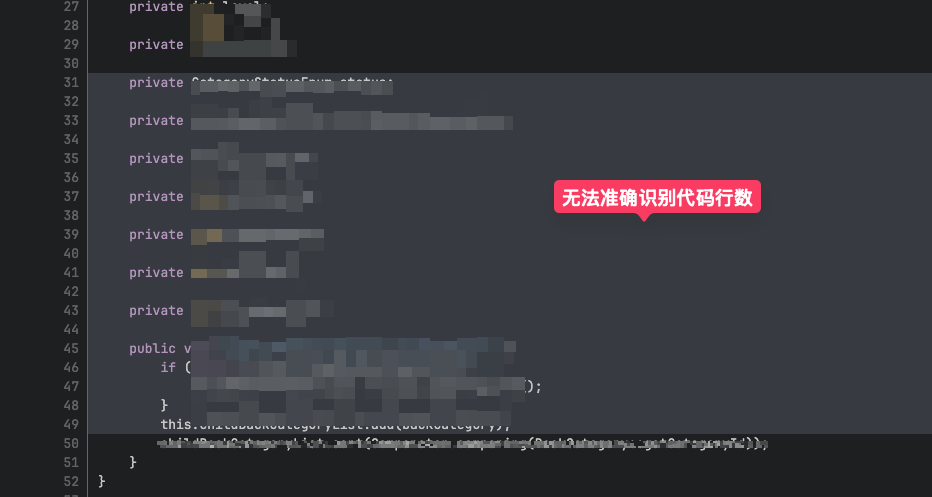
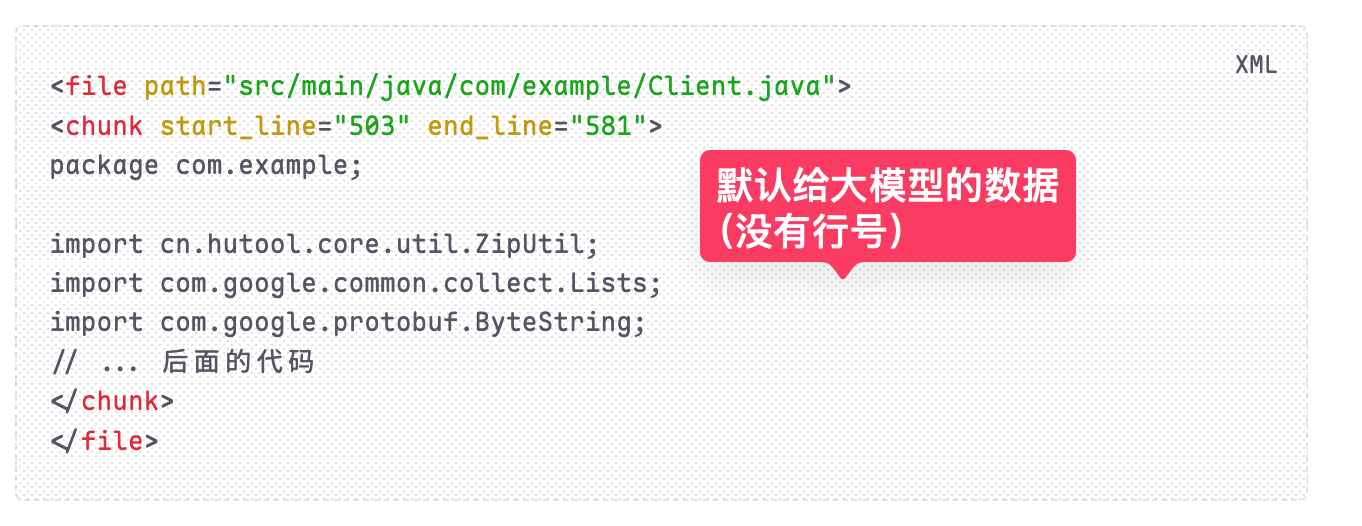
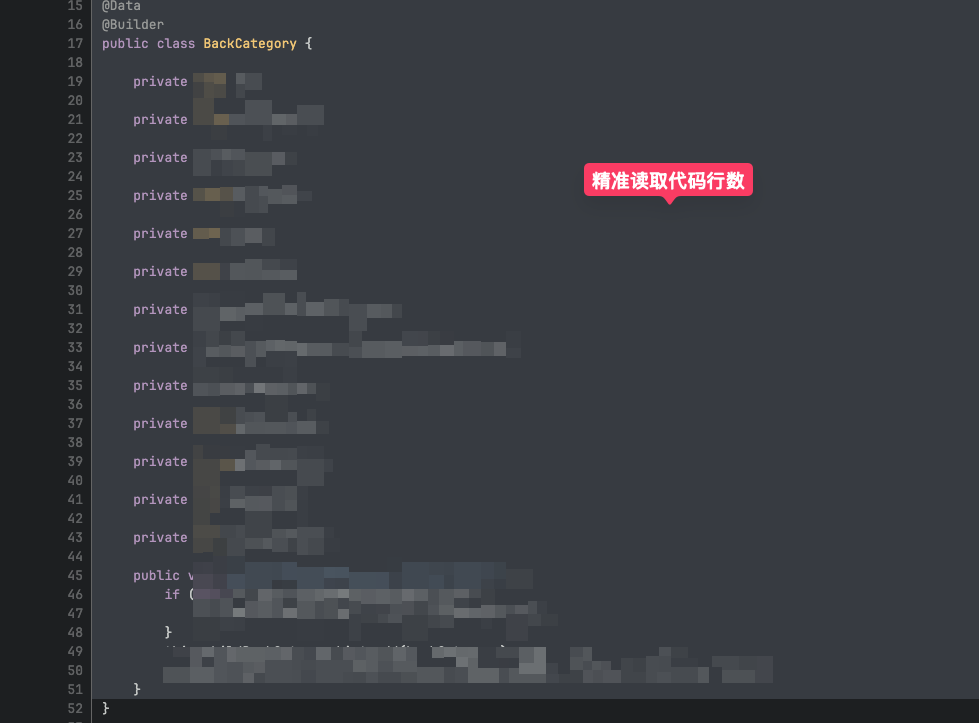
"<line_number_rules>"
"Each line in the code context is prefixed with its actual line number (e.g., '100. code here'). "
"When citing source lines, read the line numbers directly from these prefixes. "
"Do not count or calculate line numbers yourself. "
"</line_number_rules>"
deffind_proto_files(repo_path: str, excluded_dirs=None) -> List[str]: """遍历 repo 目录,返回所有 .proto 文件路径""" skip = set(DEFAULT_EXCLUDED_DIRS) # 排除 vendor、node_modules 等 proto_files = [] for root, dirs, files in os.walk(repo_path): dirs[:] = [d for d in dirs if d notin skip] for f in files: if f.endswith(".proto"): proto_files.append(os.path.join(root, f)) proto_files.sort() return proto_files
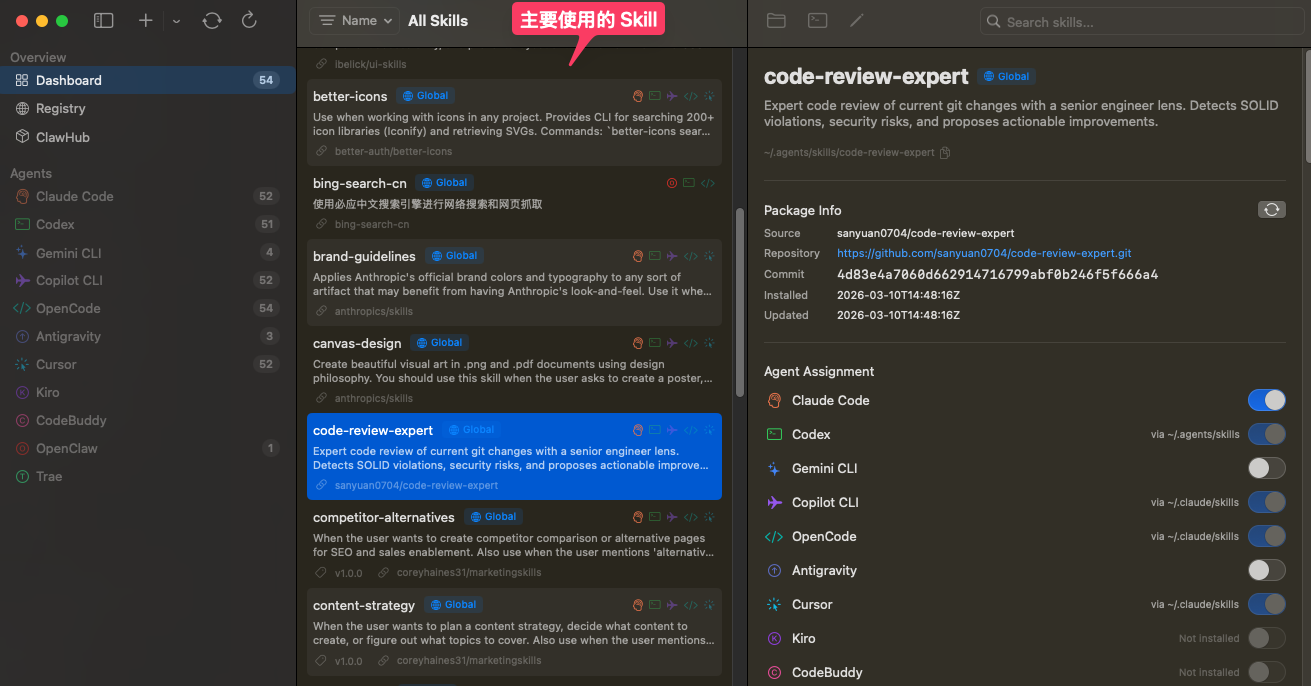
“Skills are organized folders of instructions, scripts, and resources that agents can discover and load dynamically to perform better at specific tasks.”
可以把 Skills 理解为”分类后的系统提示词”,但它比传统的 System Prompt 更智能——按需加载,而不是全量加载。
维度
传统系统提示词
Agent Skills
加载方式
全量加载:每次对话都要发一遍
按需调用:只加载需要的技能
Token 消耗
高:Prompt 长度随功能增多而爆炸
低:结合 Prompt Caching 降低成本
复杂度上限
低:Prompt 太长会”注意力失焦”
高:每个技能独立,互不干扰
执行能力
仅限”说话”
可关联 Tool Use,真正执行操作
Skills 的本质:提示词工程的进化
说到底,Skills 的本质还是前几年流行的提示词工程(Prompt Engineering)。
回想一下 2023 年 ChatGPT 刚火的时候,网上到处都是”万能提示词模板”、”让 AI 效率翻倍的 prompt 技巧”。那时候大家都在研究怎么写出更好的 System Prompt,让 AI 扮演各种角色:翻译官、程序员、文案专家…
Skills 做的事情本质上没变——**还是在告诉 AI “你是谁、你能做什么、你应该怎么做”**。
defon_check_suite(request: CheckRunCompleted): logger.info(f"Received check run completed event for {request.repository.full_name}") g = get_github_client(request.installation.id) repo = g.get_repo(request.repository.full_name) ifnot get_gha_enabled(repo): logger.info(f"Skipping github action for {request.repository.full_name} because it is not enabled") returnNone pr = repo.get_pull(request.check_run.pull_requests[0].number) num_pr_commits = len(list(pr.get_commits())) if num_pr_commits > 20: logger.info(f"Skipping github action for PR with {num_pr_commits} commits") returnNone logger.info(f"Running github action for PR with {num_pr_commits} commits") logs = download_logs( request.repository.full_name, request.check_run.run_id, request.installation.id ) ifnot logs: returnNone logs = clean_logs(logs) extractor = GHAExtractor() logger.info(f"Extracting logs from {request.repository.full_name}, logs: {logs}") problematic_logs = extractor.gha_extract(logs) if problematic_logs.count(" ") > 15: problematic_logs += "
========================================
There are a lot of errors. This is likely a larger issue with the PR and not a small linting/type-checking issue." comments = list(pr.get_issue_comments()) iflen(comments) >= 2and problematic_logs == comments[-1].body and comments[-2].body == comments[-1].body: comment = pr.as_issue().create_comment(log_message.format(error_logs=problematic_logs) + "
I'm getting the same errors 3 times in a row, so I will stop working on fixing this PR.") logger.warning("Skipping logs because it is duplicated") raise Exception("Duplicate error logs") print(problematic_logs) comment = pr.as_issue().create_comment(log_message.format(error_logs=problematic_logs)) on_comment( repo_full_name=request.repository.full_name, repo_description=request.repository.description, comment=problematic_logs, pr_path=None, pr_line_position=None, username=request.sender.login, installation_id=request.installation.id, pr_number=request.check_run.pull_requests[0].number, comment_id=comment.id, repo=repo, ) return {"success": True}
defon_check_suite(request: CheckRunCompleted): logger.info(f"Received check run completed event for {request.repository.full_name}") g = get_github_client(request.installation.id) repo = g.get_repo(request.repository.full_name) ifnot get_gha_enabled(repo): logger.info(f"Skipping github action for {request.repository.full_name} because it is not enabled") returnNone pr = repo.get_pull(request.check_run.pull_requests[0].number) num_pr_commits = len(list(pr.get_commits())) if num_pr_commits > 20: logger.info(f"Skipping github action for PR with {num_pr_commits} commits") returnNone logger.info(f"Running github action for PR with {num_pr_commits} commits") logs = download_logs( request.repository.full_name, request.check_run.run_id, request.installation.id ) ifnot logs: returnNone logs = clean_logs(logs) extractor = GHAExtractor() logger.info(f"Extracting logs from {request.repository.full_name}, logs: {logs}") problematic_logs = extractor.gha_extract(logs) if problematic_logs.count("\n") > 15: problematic_logs += "\n\nThere are a lot of errors. This is likely a larger issue with the PR and not a small linting/type-checking issue." comments = list(pr.get_issue_comments())
==========
iflen(comments) >= 2and problematic_logs == comments[-1].body and comments[-2].body == comments[-1].body: comment = pr.as_issue().create_comment(log_message.format(error_logs=problematic_logs) + "\n\nI'm getting the same errors 3 times in a row, so I will stop working on fixing this PR.") logger.warning("Skipping logs because it is duplicated") raise Exception("Duplicate error logs") print(problematic_logs) comment = pr.as_issue().create_comment(log_message.format(error_logs=problematic_logs)) on_comment( repo_full_name=request.repository.full_name, repo_description=request.repository.description, comment=problematic_logs, pr_path=None, pr_line_position=None, username=request.sender.login, installation_id=request.installation.id, pr_number=request.check_run.pull_requests[0].number, comment_id=comment.id, repo=repo, )
language_names = ["python", "java", "cpp", "go", "rust", "ruby", "php"] # and more
# Installing the parsers languages = {} for language in LANGUAGE_NAMES: subprocess.run(f"git clone https://github.com/tree-sitter/tree-sitter-{language} cache/tree-sitter-{language}", shell=True) for language in LANGUAGE_NAMES: Language.build_library(f'cache/build/{language}.so', [f"cache/tree-sitter-{language}"]) self.languages = {language: Language(f"cache/build/{language}.so", language) for language in LANGUAGE_NAMES}
defchunk(text: str, MAX_CHARS: int = 1500) -> list[str]: # Determining the language for language_name in language_names: language = languages[language_name] parser = Parser() parser.set_language(language) tree = parser.parse(bytes(text, "utf-8")) ifnot tree.root_node.children or tree.root_node.children[0].type != "ERROR": file_language = language break logger.warning(f"Not language {language_name}")
# Smart chunker if file_language: return chunk_node(tree.root_node, text, max_chunk_size)