
前言
之前看过SSM(十四) 基于annotation的http防重插件的朋友应该记得我后文说过之后要用SpringBoot来进行重构。
这次采用自定义的starter的方式来进行重构。
关于starter(起步依赖)其实在第一次使用SpringBoot的时候就已经用到了,比如其中的:
1
2
3
4
| <dependency>
<groupId>org.springframework.boot</groupId>
<artifactId>spring-boot-starter-web</artifactId>
</dependency>
|
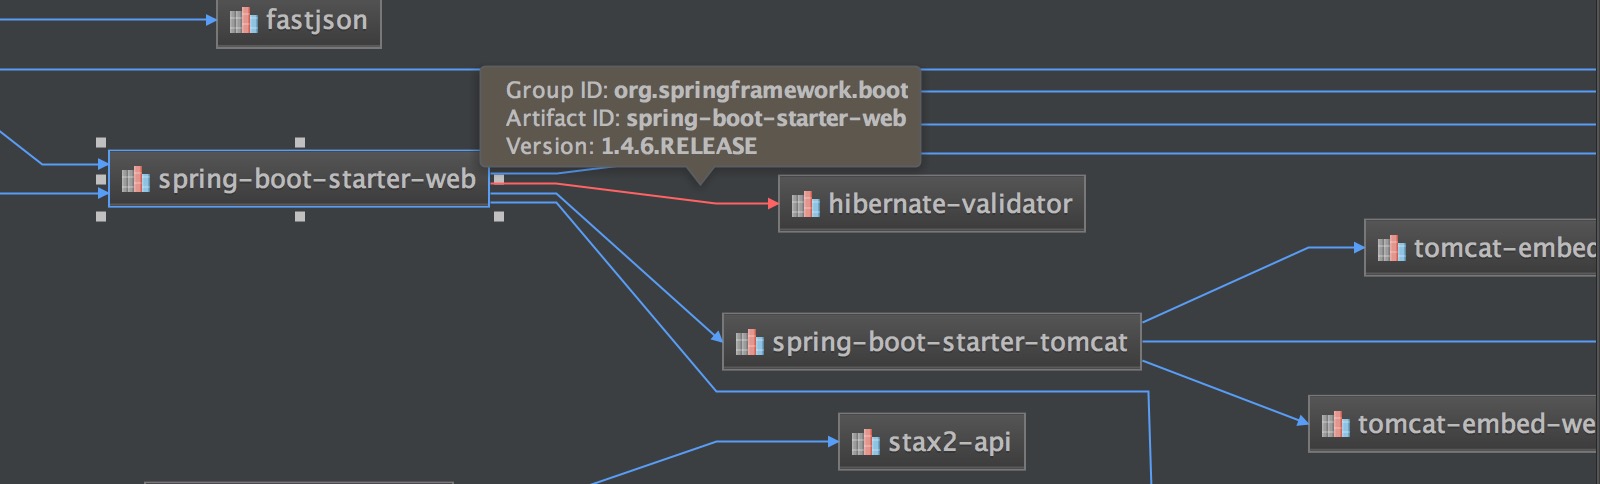
我们只需要引入这一个依赖SpringBoot就会把相关的依赖都加入进来,自己也不需要再去担心各个版本之间的兼容问题(具体使用哪个版本由使用的spring-boot-starter-parent版本决定),这些SpringBoot都已经帮我们做好了。
Spring自动化配置
先加入需要的一些依赖:
1
2
3
4
5
6
7
8
9
10
11
12
13
14
15
16
17
18
19
20
21
22
23
24
25
26
27
28
29
30
| <dependency>
<groupId>org.springframework.boot</groupId>
<artifactId>spring-boot-starter</artifactId>
</dependency>
<dependency>
<groupId>org.springframework.boot</groupId>
<artifactId>spring-boot-starter-aop</artifactId>
</dependency>
<dependency>
<groupId>org.springframework.boot</groupId>
<artifactId>spring-boot-starter-redis</artifactId>
</dependency>
<dependency>
<groupId>org.springframework.boot</groupId>
<artifactId>spring-boot-configuration-processor</artifactId>
<optional>true</optional>
</dependency>
<dependency>
<groupId>com.crossoverJie</groupId>
<artifactId>sbc-common</artifactId>
<version>1.0.0-SNAPSHOT</version>
</dependency>
|
创建了CheckReqConf配置类用于在应用启动的时候自动配置。
当然前提还得在resources目录下创建META-INF/spring.factories配置文件用于指向当前类,才能在应用启动时进行自动配置。
spring.factories:
1
2
| org.springframework.boot.autoconfigure.EnableAutoConfiguration=
\com.crossoverJie.request.check.conf.CheckReqConf
|
使用条件化配置
试着考虑下如下情况:
因为该插件是使用redis来存储请求信息的,外部就依赖了redis。如果使用了该插件的应用没有配置或者忘了配置redis的一些相关连接,那么在应用使用过程中肯定会出现写入redis异常。
如果异常没有控制好的话还有可能影响项目的正常运行。
那么怎么解决这个情况呢,可以使用Spring4.0新增的条件化配置来解决。
解决思路是:可以简单的通过判断应用中是否配置有spring.redis.hostredis连接,如果没有我们的这个配置就会被忽略掉。
实现代码:
1
2
3
4
5
6
7
8
9
10
11
| import org.springframework.context.annotation.ComponentScan;
import org.springframework.context.annotation.Conditional;
import org.springframework.context.annotation.Configuration;
@Configuration
@ComponentScan("com.crossoverJie.request.check.interceptor,com.crossoverJie.request.check.properties")
@Conditional(CheckReqCondition.class)
public class CheckReqConf {
}
|
具体校验的代码CheckReqCondition:
1
2
3
4
5
6
7
8
9
10
11
12
13
14
15
16
17
18
19
| public class CheckReqCondition implements Condition {
private static Logger logger = LoggerFactory.getLogger(CheckReqCondition.class);
@Override
public boolean matches(ConditionContext context, AnnotatedTypeMetadata annotatedTypeMetadata) {
String property = context.getEnvironment().getProperty("spring.redis.host");
if (StringUtils.isEmpty(property)){
logger.warn("Need to configure redis!");
return false ;
}else {
return true;
}
}
}
|
只需要实现org.springframework.context.annotation.Condition并重写matches()方法,即可实现个人逻辑。
可以在使用了该依赖的配置文件中配置或者是不配置spring.redis.host这个配置,来看我们的切面类(ReqNoDrcAspect)中53行的日志是否有打印来判断是否生效。
这样只有在存在该key的情况下才会应用这个配置。
当然最好的做法是直接尝试读、写redis,看是否连接畅通来进行判断。
AOP切面
最核心的其实就是这个切面类,里边主要逻辑和之前是一模一样的就不在多说,只是这里应用到了自定义配置。
切面类ReqNoDrcAspect:
1
2
3
4
5
6
7
8
9
10
11
12
13
14
15
16
17
18
19
20
21
22
23
24
25
26
27
28
29
30
31
32
33
34
35
36
37
38
39
40
41
42
43
44
45
46
47
48
49
50
51
52
53
54
55
56
57
58
59
60
61
62
63
64
65
66
67
68
69
70
71
72
73
|
@Aspect
@Component
@EnableAspectJAutoProxy(proxyTargetClass = true)
public class ReqNoDrcAspect {
private static Logger logger = LoggerFactory.getLogger(ReqNoDrcAspect.class);
@Autowired
private CheckReqProperties properties ;
private String prefixReq ;
private long day ;
@Autowired
private RedisTemplate<String, String> redisTemplate;
@PostConstruct
public void init() throws Exception {
prefixReq = properties.getRedisKey() == null ? "reqNo" : properties.getRedisKey() ;
day = properties.getRedisTimeout() == null ? 1L : properties.getRedisTimeout() ;
logger.info("sbc-request-check init......");
logger.info(String.format("redis prefix is [%s],timeout is [%s]", prefixReq, day));
}
@Pointcut("@annotation(com.crossoverJie.request.check.anotation.CheckReqNo)")
public void checkRepeat(){
}
@Before("checkRepeat()")
public void before(JoinPoint joinPoint) throws Exception {
BaseRequest request = getBaseRequest(joinPoint);
if(request != null){
final String reqNo = request.getReqNo();
if(StringUtil.isEmpty(reqNo)){
throw new SBCException(StatusEnum.REPEAT_REQUEST);
}else{
try {
String tempReqNo = redisTemplate.opsForValue().get(prefixReq +reqNo);
logger.debug("tempReqNo=" + tempReqNo);
if((StringUtil.isEmpty(tempReqNo))){
redisTemplate.opsForValue().set(prefixReq + reqNo, reqNo, day, TimeUnit.DAYS);
}else{
throw new SBCException("请求号重复,"+ prefixReq +"=" + reqNo);
}
} catch (RedisConnectionFailureException e){
logger.error("redis操作异常",e);
throw new SBCException("need redisService") ;
}
}
}
}
public static BaseRequest getBaseRequest(JoinPoint joinPoint) throws Exception {
BaseRequest returnRequest = null;
Object[] arguments = joinPoint.getArgs();
if(arguments != null && arguments.length > 0){
returnRequest = (BaseRequest) arguments[0];
}
return returnRequest;
}
}
|
这里我们的写入rediskey的前缀和过期时间改为从CheckReqProperties类中读取:
1
2
3
4
5
6
7
8
9
10
11
12
13
14
15
16
17
18
19
20
21
22
23
24
25
26
27
28
29
30
31
| @Component
@ConfigurationProperties(prefix = "sbc.request.check")
public class CheckReqProperties {
private String redisKey ;
private Long redisTimeout ;
public String getRedisKey() {
return redisKey;
}
public void setRedisKey(String redisKey) {
this.redisKey = redisKey;
}
public Long getRedisTimeout() {
return redisTimeout;
}
public void setRedisTimeout(Long redisTimeout) {
this.redisTimeout = redisTimeout;
}
@Override
public String toString() {
return "CheckReqProperties{" +
"redisKey='" + redisKey + '\'' +
", redisTimeout=" + redisTimeout +
'}';
}
}
|
这样如果是需要很多配置的情况下就可以将内容封装到该对象中,方便维护和读取。
使用的时候只需要在自己应用的application.properties中加入
1
2
3
|
sbc.request.check.redis-key = req
sbc.request.check.redis-timeout= 2
|
应用插件
使用方法也和之前差不多(在sbc-order应用):
1
2
3
4
5
6
|
<dependency>
<groupId>com.crossoverJie.request.check</groupId>
<artifactId>request-check</artifactId>
<version>1.0.0-SNAPSHOT</version>
</dependency>
|
1
2
3
4
5
6
7
8
9
10
11
12
13
14
15
16
17
18
19
20
21
22
| @RestController
@Api(value = "orderApi", description = "订单API", tags = {"订单服务"})
public class OrderController implements OrderService{
private final static Logger logger = LoggerFactory.getLogger(OrderController.class);
@Override
@CheckReqNo
public BaseResponse<OrderNoResVO> getOrderNo(@RequestBody OrderNoReqVO orderNoReq) {
BaseResponse<OrderNoResVO> res = new BaseResponse();
res.setReqNo(orderNoReq.getReqNo());
if (null == orderNoReq.getAppId()){
throw new SBCException(StatusEnum.FAIL);
}
OrderNoResVO orderNoRes = new OrderNoResVO() ;
orderNoRes.setOrderId(DateUtil.getLongTime());
res.setCode(StatusEnum.SUCCESS.getCode());
res.setMessage(StatusEnum.SUCCESS.getMessage());
res.setDataBody(orderNoRes);
return res ;
}
}
|
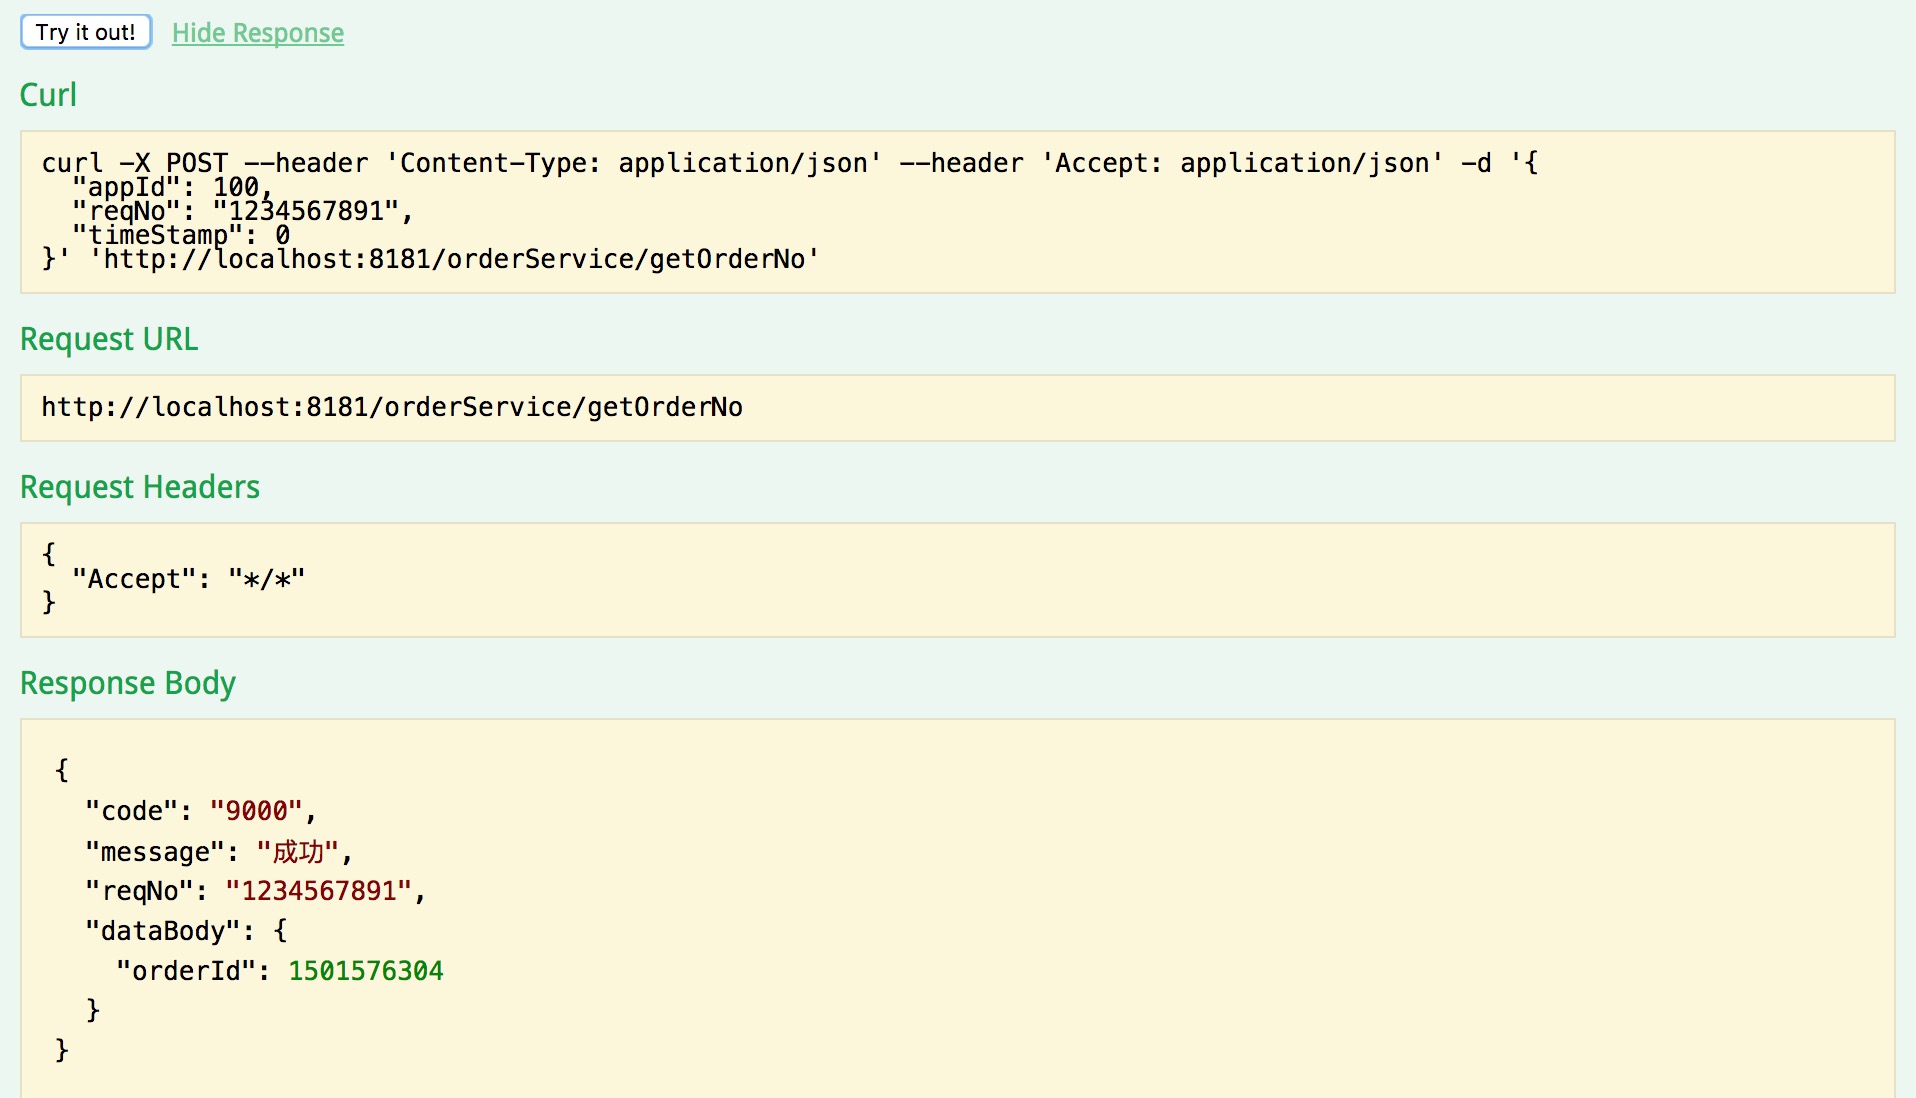
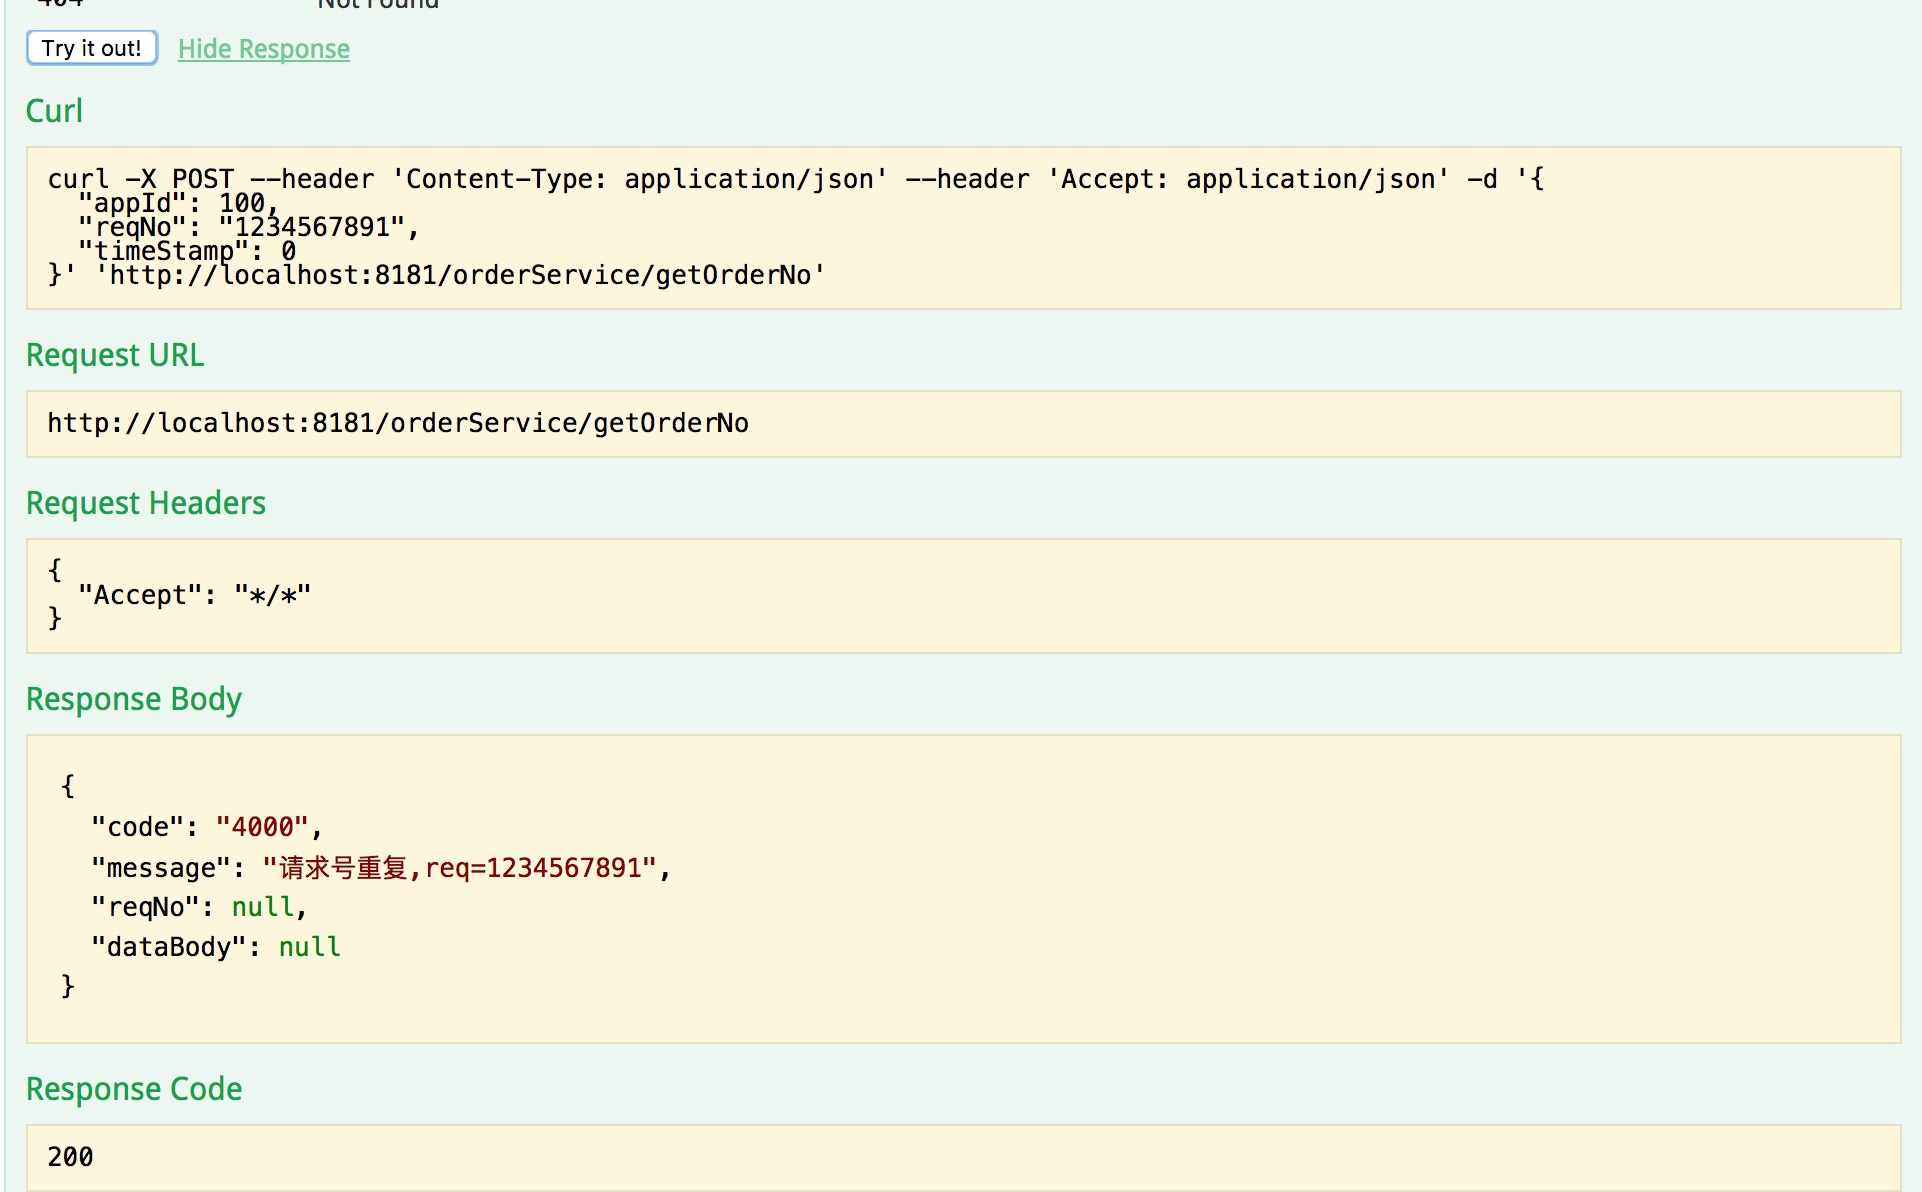
使用效果如下:
总结
注意一点是spring.factories的路径不要搞错了,之前就是因为路径写错了,导致自动配置没有加载,AOP也就没有生效,排查了好久。。
项目:https://github.com/crossoverJie/springboot-cloud
博客:http://crossoverjie.top。